Helpful tips on caring your vineyard and how to prune grape vines
If you’re trying to grow your own grapes, or even have established plants, the time will come that you will want to prune them.
Grapes, which are technically berries, are one of the world’s healthiest foods. Instead of keep buying them from the greengrocer or supermarket, you might want to grow them at home.
Buy do you know how to prune grape vines? What is the safest way? And when is the best time of year to prune your crop to make sure it produces the best fruit?
There’s a lot of information around about grapes so it can be difficult to know which advice to follow and what works best. In this guide, we will talk you through everything you need to know and how to prune your grape vine.
Caring for your grape vine
When you first plant your grape vine, make sure it has plenty of water. Vines in a greenhouse or a container will need regular watering as they won’t benefit from rain.
You should also add a high-potash liquid feed to your plants in the first year or so.
In late winter, you should use mulch to keep moisture in the soil and try not to let your grape vines flower for the first couple of years to make sure they are at full strength when you first start harvesting fruit.
Setting up your grape vines
All grape vines need some sort of support to help them grow. Whether you use wooden canes, a trellis or any other system such as wires it is absolutely crucial they have something to climb up.
If you are growing in a greenhouse, you can run canes along one end of your greenhouse and then encourage the grapes to grow up and then across the roof. Using the metal structure of your greenhouse, you can just tie on the plant as it grows so it stays in one place.
Any wire or canes you use should be placed about 45cm (18in) apart.
Tips to make your grape vines strong and healthy

Vineyard
- Use pebbles around the bottom of your grape vine to stop weeds growing up and keep moisture in
- Grapes love moisture so you should make sure they are manually watered through summer and any prolonged period without rain
- Water thoroughly once or twice a week rather than sprinkling the plant every day
- For the first two years, pull off all the flowers. This stops your plant from producing too many fruits which will be sour
- The fewer amount of grapes there are the better tasting they will be
- To ripen your fruit well, make sure there are no leaves shading them
- Grapes need cold to produce flowers so make sure you are not artificially heating your greenhouse through the winter.
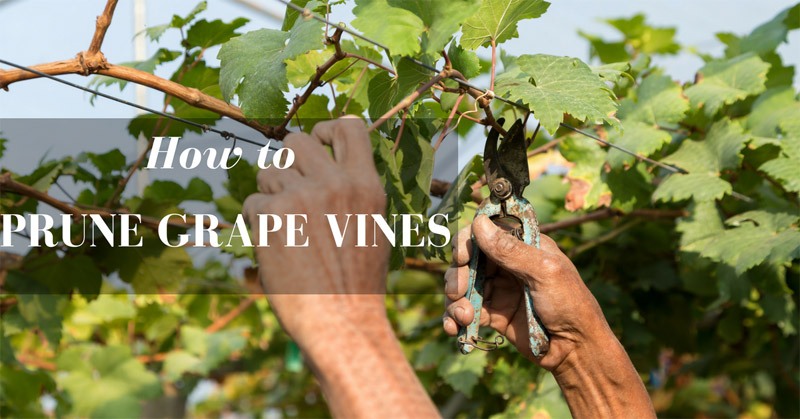
Tools you will need to prune your grape vine
- Shears
- Wire or gardeners twine
- Wooden canes
- Gardening gloves
When should you prune your grapes?
Grapes should always be pruned in the winter about a month before spring. As the plant grows most of the year, the only time the vine is dormant is through the winter.

Vineyard pruned during the winter waiting for the next season
Grape vines have one main stem, called the leader, and laterals grow off this main shoot with sub-laterals growing off them. The fruit itself grows on the lateral and sub-lateral branches.
In the winter, it is safe to get rid of about a third of the overall grape vine. This seems a lot but it will give your plant the chance to concentrate on new growth and be more productive when spring comes round again.
Most people feel worried about pruning their grape vine but the reality is most plants fail due to under-pruning.
Step by step: How to prune your grape vines
1. Reduce the shoot system
Before planting your new grape plant, you should make sure the amount of shoots are cut down to only the strongest. Prune your plant to ensure you only have the strongest, thickest shoots.
2. Cut back the buds
Looking at the main stem, you should count along until you see three buds and then cut your plant just above the third bud. By doing this, you are strengthening the new buds on the plant and encouraging the vine to focus efforts on one place rather than trying to grow out all over. This is called “training” your vine.
3. Take away new shoots
Cut off all of the new shoots that are about eight inches long apart from the one you consider the strongest and healthiest. This might seem extreme but this is the correct way to prune your plant to ensure all the plant’s energy is concentrated on protecting and putting energy into the strongest area of the plant.
4. Check before pruning
Before starting to cut back the plant in winter, check the growth. Your main stem should be about 30 inches long. If it is taller, cut it down to around this height.
5. Caring for your vine
Once it is the length you want, and it has the right amount of shoots and buds, you should ensure it is tied up and supported. Use your gardener’s twine or wire to attach the main stem to a suitable support structure.
So if you’ve been thinking about buying and growing a grape vine, or even if you’re coming up to the first time you will have to prune an existing plant, we hope you have found this article helpful.
By understanding the best way to care for your plant, getting the right tools for the job and following these step by step instructions you can make sure your plant is strong and healthy.
Correct pruning will lead to bigger, tastier fruit and with a little bit of patience, you can ensure you have plenty of grapes.
If you have any other tips or advice please comment below and don’t forget to share this article with your friends and family.